

Part # Search
Part # Search
Error
Error loading form!
- Body Mouldings & Clips
- Belt Mouldings
- Door Center Mouldings
- Fender Mouldings
- Hood Mouldings
- Reveal Mouldings
- Rocker Mouldings
- Running Board Mouldings
- Body To Frame
- Brakes
- Brake Light Switch
- Disc Brakes
- Drums
- Emergency
- Floor Plug
- Fluid
- Gaskets
- Hardware
- Hoses
- Lines
- Master Cylinder
- Overhaul Kit
- Wheel Cylinder
- Bumpers
- Car Care
- Clutch
- Convertible
- Bow
- Cylinders
- Frames & Windows
- Grommets
- Hardware
- Hoses
- Knobs
- Latches
- Lines
- Manuals
- Mirrors
- Mounts
- Pads
- Pump
- Side Rail
- Switches
- Tops
- Visors
- Weatherstrip
- Cooling & Radiator
- Belts
- Core Support
- Fans
- Hose Clamps
- Hoses
- Overflow
- Radiator
- Radiator Brace
- Thermostat
- Trans Cooler
- Water Pump
- Dashboard
- Bezels-Plastic
- Cables
- Cowl Vent
- Dash Panels
- Glove Box
- Knobs
- Lighter-Ashtray
- Paint
- Script
- Starter Button
- Steering Column Insulator
- Tissue Dispenser
- Traffic Light Viewer
- Door
- 41 Cabriolet Window Flippers
- Armrest
- Bezels-Plastic
- Check Link
- Detents
- Dovetails
- Frame
- Garnish Moulding
- Handles Exterior
- Handles Interior
- Hinges
- Latch-Striker
- Locks
- Panels
- Pins & Bushings
- Prop
- Tools
- Windlace
- Wood Frame Sedan Delivery Rear Door
- Door Weatherstrip
- Driveshafts
- Electrical
- Engine
- Accessory Dress Up
- Crate Engines
- Cylinder Head
- Engine Bolt Kit
- Engine Rebuild Kits
- Gaskets & Sealers
- Mock Blocks
- Motor Mounts
- Oiling
- Plugs
- Short Block
- Timing
- Valve Covers & Related
- Exhaust
- Accessory Tailpipe Extensions
- Exhaust Systems
- Flame Thrower Kit
- Gaskets
- Hangers
- Manifolds
- Mufflers
- Paint
- Pipes
- Studs
- Exterior
- Fender
- Bolt Kit
- Braces
- Core Support Panel
- Curb Feelers
- Fenders
- Gaskets
- Gravel Guards
- Guide Accessory
- Inner Fenders
- Mouldings
- Ornaments
- Script
- Skirts
- Welting
- Firewall
- Floorboard
- Front Suspension
- A-Frame, Shafts, Pin
- Bushings
- Conversions
- Dropped Uprights
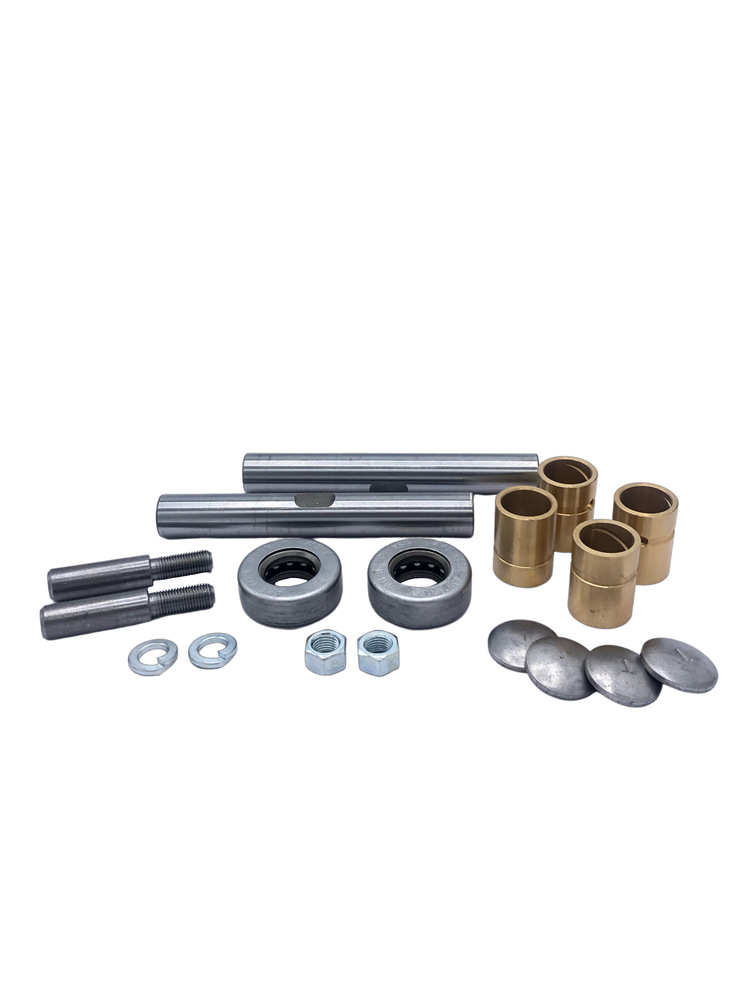
- Kingpins
- Rebuild Kits
- Rubber Bumpers
- Shocks
- Springs
- Sway Bar
- U-Bolts
- Fuel Systems
- Additives
- Air Cleaner
- Carburetors
- Clamps
- Filters
- Fuel Lines
- Fuel Pumps
- Gas Cap, Door, Hoses
- Gas Tank
- Manifolds
- Sealers-Tank Slosh
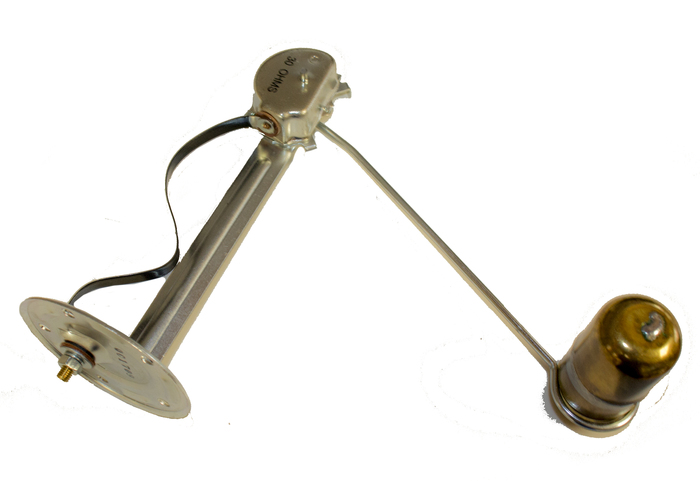
- Sending Unit
- Glass
- Backglass-Rear Window
- Corner Cab
- Door
- Frames
- Power Windows
- Quarter
- Setting Tape
- Suburban
- Vent Window
- Vent Window Glass
- Window Channel Kits
- Window Components
- Windshield Rubber
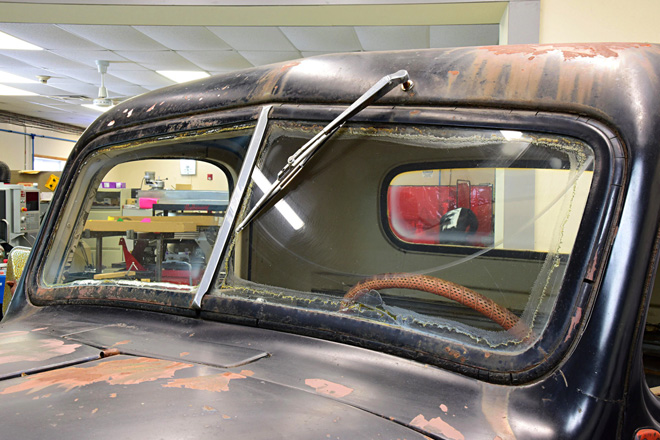
- Windshields
- Grilles
- Heater & AC
- AC Complete System
- Brackets
- Clamps
- Compressor
- Decals
- Grommet
- Heater
- Heater Core Rebuild
- Hose
- Knobs
- Motor
- Odds & Ends
- Operation Card
- Paint
- Switch
- Vent
- Wiring Harness
- Hood
- Cables & Handles
- Center Moulding
- Emblems
- Hardware
- Hinges
- Hoods
- Latches
- Moulding & Script
- Ornaments
- Prop
- Seals & Bumper
- Springs
- Instrument Gauges
- Auto Meter
- Classic Instruments
- Clock
- Dakota Digital
- Decals
- Instrument Glass
- Oil Gauges
- Omega
- Original
- RPC
- Speedometer
- Temperature Gauge
- Wiring
- Interior
- Ashtray
- Carpet
- Coat Hooks
- Dome Light
- Fasteners
- Flashlight
- Hardware
- Hat Holder
- Panels
- Seat Parts
- Seatbelts
- Sunvisors
- Upholstery
- Windlace
- License
- Lights
- Back Up Lights
- Bed Roll Lights
- Bulbs
- Driving Lights
- Fog Lights
- Headlights
- Park Lights
- Spotlights
- Taillight
- Turn Signal
- Mirrors
- Paint
- Printed Material
- Accessory Install Sheets
- Books
- Casting Numbers
- Decals
- Fishers Body Manuals
- Instruction Cards
- Metal Tags
- Owners Manual
- Parts Book
- Photos
- Price Guide
- Radio Manual
- RPO Books
- Sales Brochures
- Service Bulletin
- Shop Manual
- Signs
- Templates
- Radio
- 1937 Car
- 1937-1939 Truck
- 1938 Car
- 1939 Car
- 1940 Car
- 1940-1946 Truck
- 1941 Car
- 1942 Car
- 1946-1948 Car
- 1947-1954 Truck
- 1949 Car
- 1950 Car
- 1951-1952 Car
- 1953-1954 Car
- Antenna
- Condenser
- Other Components
- Paint
- Tubes
- Vibrators
- Rear Axle
- Rear Suspension
- A-Frame, Shafts, Pin
- Bushings
- Independent Rear Suspension
- Lowering Blocks
- Rubber Bumpers
- Shocks
- Springs
- Sway Bar
- U-Bolts
- Sheet Metal
- Air Duct
- Cab
- Core Support
- Cowl
- Doors
- Fender
- Firewall
- Floorboards
- Foot Scraper
- Hood
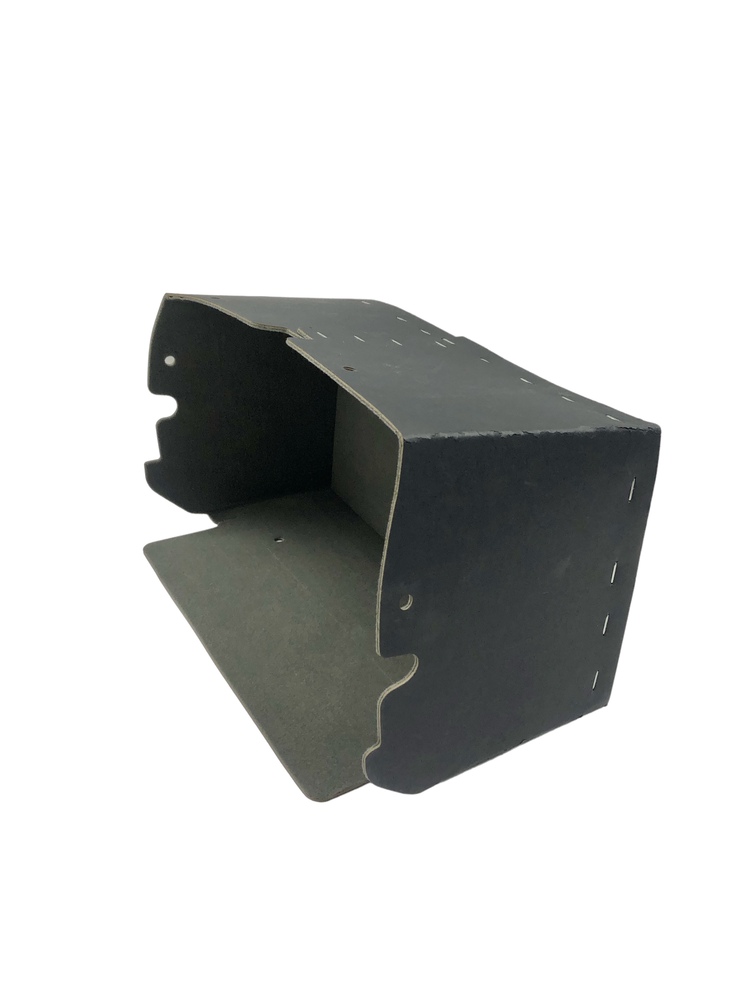
- Kick Panel
- Panel Below Trunk Lid
- Quarter Panel
- Rocker Panels
- Roll Pan
- Running Boards
- Seat Brace
- Splash Aprons
- Sunvisors
- Toe Boards
- Windshield Pillar
- Sill Plates & Running Boards
- Steering
- Cruise Control
- Grommets & Bushings
- Idler Arm
- Mast Jacket Bearings
- Pitman Arm
- Power Steering
- Rebuild Kits
- Shift Indicators
- Steering Columns
- Steering Wheel
- Tie Rods
- U-Joints
- Worm Gear
- Transmissions
- Bearings & Bushings
- Coolers
- Crossmember
- Dipstick
- Gaskets
- Gear Shift Indicators
- Gears
- Kickdown Kits
- Lines
- Mounts
- Pan
- Powerglide
- Rebuild
- Shift Linkage, Knobs, Boots
- Speedometer
- Transmissions
- Vacumm Shift
- Truck Beds
- Trunk
- Emblems, Script
- Floor
- Handles
- Hinges
- Latches
- Locks
- Mat-Carpet
- Props
- Rumble Seat
- Tool Tray
- Trunk Lids
- Weatherstrip
- Wheels
- Bearings
- Beauty Rings
- Discs
- Dust Covers
- Hubcaps
- Lug Nuts & Studs
- Tires
- Tubes
- Valve Stem Caps
- Wheel Cover
- Wheels
- Wiper